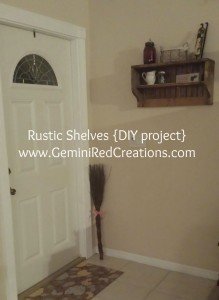
Before my friend Jennifer V went off and had a baby she was always busy working on some really cool wood projects. Here’s a great one to share with you – it’s easy enough for anyone to try! And, it’s an especially great project for when the weather is cooler outside.
As the weather gets cooler, Jennifer likes to start decorating and thinking of all things holiday-like. With that in mind, she really wanted a primitive/rustic shelf to put in the entryway to decorate for the season. By Googling “primitive shelf” and she found a couple of designs, and instead of buying any of them, she went ahead and made one. There were no plans for the one she found, so she measured the wall where it would go and figured out what size she would need to make it. Now it’s your turn to try it out! Keep in mind you can alter it to fit the size of the area you have.
So here’s the supply list:
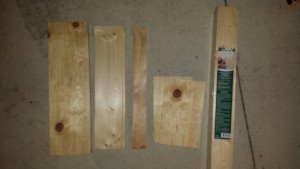
– 1X8 (Cut into two 12” long pieces and one 24” piece)
– 1X6 (Cut into one 22.5” piece)
– 1X3 (Cut into one 22.5” piece)
– Stainable Beadboard (or Wainscotting) – the kind that you snap together. Enough to make a 24” by 12.75” piece.
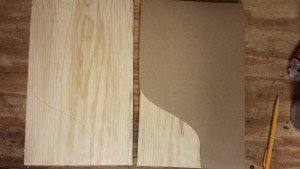
The sides of the shelf needed to have some personality, so I designed the profile on my Silhouette Studio software and cut it out on chipboard as a stencil (have I mentioned how awesome the Silhouette Cameo is?). This will be used on the two 12” pieces of 1X8. Here’s the design:
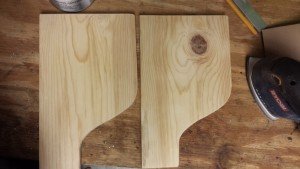
I traced it onto the wood and cut them out with my scroll saw. Don’t worry if they’re not perfect. One of my favorite things about primitive type stuff is how unique the pieces are – they never look perfect!
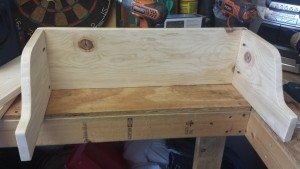
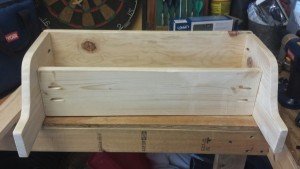
I then attached the side pieces to the top of the shelf (the 24” piece of 1X8). I attached them using pocket holes with the help of my Kreg Jig. If you’re interested in making any type of wood furniture, I HIGHLY recommend getting the Kreg Jig. It’s wonderful and very easy to use. Here is the top piece attached to the sides using pocket holes (You want to make them more evenly spaced out than mine. I messed up experimented during production!)
I went ahead and attached the middle shelf the same way (this will be your 22.5” piece of 1X6). I wanted this piece to hang in a little bit, which is why I chose the 1X6. Remember, don’t worry if it’s not perfect! That’s the point : )
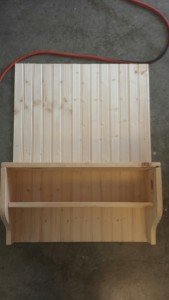
The next step is putting together your beadboard and measuring how much you’ll need. I set the shelf on top of the beadboard all fitted together, and traced around the shelf.
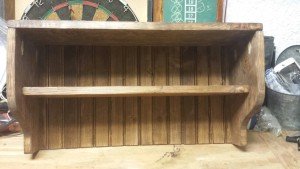
I then cut all of the beadboard with my miter saw. I put them all together and went ahead and stained them before putting it on the shelf unit. I filled the pocket holes with stainable wood filler and then stained the shelving unit. I used Rustoleum’s Dark Walnut – one of my favorites!
HINT: In hindsight, I would have preferred to stain all of the wood before putting it together because of some tight spaces. I just had to make sure I had some mineral spirits around to wash my hands since I got quite a bit of stain on my skin during this process : ) Whoops!
After everything dried, I nailed the beadboard onto the back of the shelving unit. Here she is, almost done!
The last step was adding a bottom “trim” piece (your 1X3). I contemplated putting hooks or knobs there for decoration, but for now I’m holding off. I may feel like adding that in the future for some pizzazz.
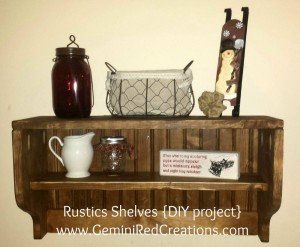
So then she went up on my wall. Are you ready!? She’s perfect. I put some fun decorations on her and now I am so in love with my entryway! It’s a work in progress, but this improved it SO MUCH. I can change the décor out for every season and it brings a little smile to my face when I walk inside.
I hope you can make your own and love it as much as I do! Feel free to comment if you have any questions while you’re building your own.
Are you ready to create your own rustic shelves?


